
Tips on How to Make A Simple Self-Bow
There is an absolute ton of good information that can be had by way of the Internet, books, and magazines if one really wants to make a bow and arrow of their own. To be perfectly honest with you I had little patience when I got the urge to cut down the nearest branch and string it up to make my first “homemade bow”. So, I took a little trip to the field behind the house and began my search for the closest donor tree or branch!
I remember the cool-looking bows that the natives were shooting at the great white hunters as they tried to escape the arrows raining down upon them in the old Tarzan movies! My obsession with archery grew stronger with every passing year. Trial and error were the “twin brothers” who held my hand throughout my building adventures. The information that I gathered, and some serious time spent in the woods just observing, helped me make up my mind that anyone could make a bow and arrow.
Beginning the Self-Bow Journey
To make such a weapon is in fact very easy. The tricky part is reading what the woods or environment is telling you, as this is the key to making a working bow and arrow. Like I said before, you should be guided by not only the stick that you are carving on but also the woods it came from! Do not discredit me yet or think I can also talk with the animals. With the right guidance, you should have no problem making a fine bow... no need for special moisture meters, calipers, special cutting ramps or sleds on a wood planer.
You won’t even need to cross-reference different tree identification guides for your area or learn the proper Latin name of the specimen you will probably end up breaking anyway. This all can be done at a later date, but for now, it is you, your cutting tool, and a piece of wood. You are probably as anxious as I was to just get out there and cut a branch, string it up and shoot something that resembled an arrow from it!
Here is a pretty good list of tips and suggestions that I have stumbled upon in my journey. There will be some I am leaving out, as there are SO many different scenarios we could go through with different woods and designs for a bow. I believe that this small list will help you achieve the ultimate goal is sending skyward, a speeding arrow
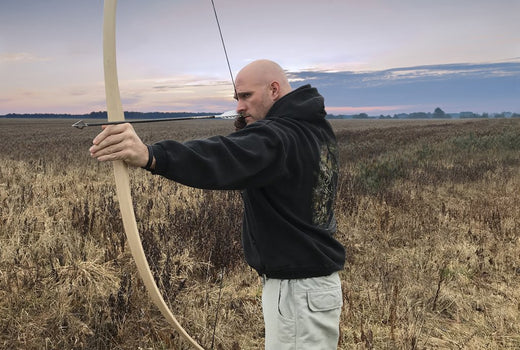
For what purpose will you use it? Will it be a hunting bow? A short brush bow? A small game bow? A simple gift to give away to a friend to introduce them to archery? Or an experimental bow to test an unknown piece of wood or branch?
Choosing Wood for Your Self-Bow
-
Do not get caught up on a specific bow design!
You may totally change your idea or concept when you find the donor wood. You can cut bow wood ANY time of the year! Fall and winter are best, but not a rule! The bark removal will be easier if you cut your wood during the Spring or Summer months because there is more moisture.
Trees grow year-round, that is why they have early and late growth rings...if the tree did not have these it would be dead! If you take your bow wood in the Fall or Winter, the bark will be harder to remove as the sap is now flowing back into the roots for winter and the wood will have less moisture content. Do not take the first good-looking piece of wood you find! Just mark it, if you found this one, you will find more.
-
When you cut a piece of wood for your bow, cut the wood a little longer than you are tall.
Look deeper into woodlots for your donor tree, sapling or branch. Straighter trees tend to grow from thicker woods as they try and reach for the life-giving sun in the overhanging canopy. Do not worry too much about the “pin knots” in smaller saplings or branches, as they are not fully-grown and you can usually just leave them proud on the back, belly or side of your bow.
-
No tree is perfect;
you just need to realize what to do when you run into them during the process. Remember to leave larger knots “Proudly”. Leave a gradual mound of wood around each knot like an imperfection in your bow stave, as they are potential weak areas.
-
Before cutting down your tree or sapling, be sure to look over the Southside of the tree.
In the Northern hemisphere, the Southside of trees and shrubs are prone to have more branches or pin knots on that side. Also remember that if the Southside of the tree is getting more light, that is the side of the tree you want to really examine well, as this side of the tree’s growth rings will be the thickest or most dense.
This property makes the bow very strong, and usually, this is the side that you will want to make the back of the bow stave (the side that faces away from the archer).
-
Try to avoid trees or branches that are exposed to prevailing forces of nature, like wind, rain, beating snow and harsh weather.
These specimens usually are more twisted and have more compression qualities than tension properties caused by the conditions it grew under. When you bring your bow wood home, if you remove the bark right away, try to keep it out of direct sunlight and wind. If you leave the bark on, it will be harder to remove the longer you let it sit or cure.
-
If you decide to make a bow right away with a branch or sapling and do not have any fat or grease to seal it naturally, keep the bark on.
Make a fire over the soft or sandy ground, after you have made a hotbed of coals, sharpen one end of the bow wood and push it just under the coals into the ground. Do this long enough to heat the wood, but do not let it get too hot to touch.
-
If it is too hot to touch, take it out of the coals and place the other end under the coals to heat it up in the same fashion, then alternate.
Do this until the sharpened end splits then pull it away from the fire. Then proceed to remove the bark completely. Now with both ends dark and cracked, and drier than the mid-section, wave the mid-section over the bed of coals without scorching. Do this until there is no more moisture sweating from the stave.
-
Use the fats from beginning to end in your bow making!
As you remove the bark, seal it with heavy fats. It will slow down the moisture loss and prevent checking and cracking in fresh woods. It also helps protect the bow when you work it in the different stages of wood removal and prevents excess moisture from entering the fresh wood wounds.
-
Using fat-like, rendered animal fat, lard, or oils protects and seals the wood.
Fat is also a wonderful protective sealant when it is burnished into the finished product. I recommend burnishing it completely.
Working Your Bow

Every action you make to the bow will have an equal and opposite reaction. This is the rule of nature. Do not try to force it to bend or pull in a direction it doesn't want to be worked in. You will have trouble if you try to force heat, induce reflex, or flip the tips, re-curving a bow that has no natural re-curve in it.
Surely it can be done, but it will fight you all the way, either by lifting splinters, breaking down internally, or flat out breaking on you. Listen to what the bow is telling you when you are cutting or scraping into it. If the tool is chattering or wanting to drag uneasy, work at it from another angle or side, go with the flow of the wood.

Slowly reach the intended draw length when removing wood during the bow making process. Pull the bow quarter draw 50 times, then half draw 50 times, then three quarter draw 50 times, then full draw 50 times. Make sure every inch of the working limb is doing its fair share of the work.
Then leave it strung at the brace height that it will be at when at rest for 6-8 hours. Then unstrung and let sit for the same amount of time. This process will give the wood “memory” of what it should do when stressed to the limits that it will be under normal conditions.
Do not overdraw the bow past its worked into or set draw length! Just remember to not over complicate a simple self-bow. It should be just that…simple, effective and fun to build!
4 comments

PCI compliant and a Verified Authorize.net Merchant
We accept Visa, Mastercard, Discover, AMEX, and PayPal

We are American Owned & Operated since 2010

Very informative…. First I’ve heard about greasing… Makes good sense!!!
do u know what type of tree the plains Indians used?
I want to use some hedge to hand make short little bows for the kids to learn on and for nice displays of hand crafted bows. I dont want to go back in time and make anything to use to wound a deer with a stick. I have the very best Mathews equipment for my killing deer. I hunt arrowheads in the fields. Finding arrowheads is so rewarding for me. I find Rage at Bass Pro Shop for hunting. I really want to do what I did as a kid and play with a handmade bow and introduce kids to what I enjoyed. I dont mix toys with weapons to kill
What is the best material to use for the bowstring and do you have any instructional videos