A Complete Guide to Building a Fire in Cold Winter Weather
Winter outdoor activities can be thrilling. From hiking and hunting to winter camping trips, there’s plenty of adventure for those willing to brave the freezing temperatures. However, activities in cold weather do require a different kind of preparation, special equipment, and wilderness survival know-how.
You don't want to get caught in winter conditions in a survival situation without knowing how to stay warm. That's why one of the critical skills you need to have to survive in the great outdoors is fire building.
Knowing how to start a fire on the bare ground, stone floor, or on wet snow requires skills and the proper materials. But, with the right tools and knowledge, you can avoid dangerous winter situations. If you're unsure how to build fires in the cold, read on to learn everything you need to know about winter fire-making.
Challenges of Starting a Fire in the Cold
When camping or hiking during winter, temperatures can be frigid. If you can’t keep warm while camping, you could experience hypothermia.
Ultimately, knowing how to start a fire and having a fire-starting kit can be the difference between an unforgettable outdoor adventure and a life-threatening ordeal in the wilderness. And even if you aren't in a dire situation, fire is beneficial for cooking, making water by melting ice or snow, and keeping wild animals away.

But starting a fire in the winter around fluffy snow can be difficult. Here are just a few challenges you might face:
- The snow can melt into the ground, dampening the wood and causing your fire to burn out.
- The materials you use as a fire starter can take time to ignite, especially if you're using slightly damp wood, pine needles, or fallen timber that’s been soaking in the wet snow.
- The wind can also create significant challenges. Depending on the intensity, you might not have long to get your flame going before the next gust blows it out.
The bottom line is this: if you like to spend time deep in the woods, you should have a good fire kit and know how to use it.
How to Build a Fire in the Winter
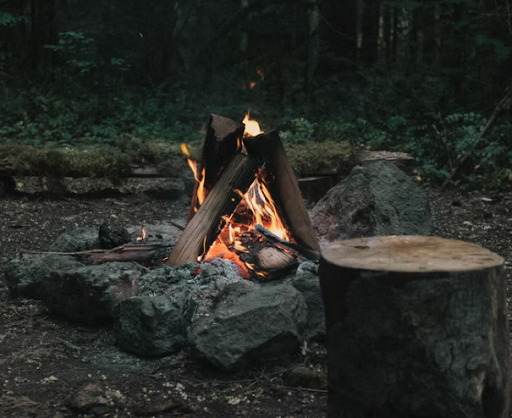
When you’re out in the woods and need to make camp for the night, you’ll want to start a winter campfire to keep warm and cook a nourishing meal. But how do you start fires when surrounded by nothing but wet snow?
Follow these next few steps and become a pro at winter fire building.
Step #1: Choose Your Fire-Starting Tools Wisely
Starting a fire in the cold outdoors can be challenging. And if you don't have the right tools, it might be next to impossible. Here are a few powerful and efficient options to consider packing:
- Pathfinder Mini Inferno: A fantastic all-weather fire starter, the Pathfinder Mini Inferno is the best option as an accelerant source for your fire. It provides five to seven minutes of flame and is a reliable way to start a fire. It’s also waterproof and only requires a spark to ignite, rather than a running flame.
- Pathfinder HD6 Ferrocerium Rod: This tool is a must-have for every outdoors enthusiast’s pack as it’ll provide the consistent and significant sparks that your Mini Inferno will need to ignite.
You can also consider alternative options to fuel the fire, including:
- Small sticks
- Cotton balls or dryer lint
- Fuel or petroleum jelly
When you settle into your campsite, collect several rocks and an extra stash of logs and sticks. The extra wood will help you keep the fire roaring throughout the night. Additional implements that will round out your outdoor experience and keep you safe include:
- Waterproof matches
- A few lighters
- Rescue/thermal blankets
- First aid kit
Select a Good Site
Choosing the right location to start a fire in the snow is essential for success. Look around and choose the site with the least water and snow. If possible, find an area that is protected from the wind.
Prime fire-starting locations are found under big trees or next to a cliff face, which can serve as a good heat reflector.
If you decide to make the fire pit under a tree, look up to see whether the tree is covered in snow and has loose branches. You want to remove the loose branches and the snow to avoid a potential injury. This will also prevent snow from falling into your fire and quenching it.
Once you've eliminated any potential threats, continue clearing the ground by removing any debris and snow. Brush away the snow to ground level or stomp it with your feet. If you stomp the snow, you will need a platform with rocks to stop the melted snow from draining your fire.
In addition to clearing the area where you’ll start the fire, clear another spot to store any extra dry wood and smaller sticks.
Make a Fire Pit and Build the Fire Lay
Now that your site is clear, the next step is to make a fire pit or fire lay. You will need large pieces of dry wood and stones. Avoid using damp logs in the beginning until the heat rises. Of course, you can always use the Mini Inferno as a standalone heat source to dry materials like pine needles, a tinder bundle, and small twigs or sticks.
There are three parts to building the fire lay: tinder, kindling, and fuel. Do your best to form a platform for your fire with dry wood and stones.
The goal is to start the fire one to two inches above the ground. This will help you avoid the snow and frozen ground, so your fire can start quickly and generate the most heat.
Your tinder will be materials like pine needles, dry leaves, dry grasses, and bark shavings. Your Mini Inferno and Ferrocerium Rod combination will help light this tinder bundle. The kindling you’ll use should include sticks and twigs about the size of a pencil (or smaller), which will be piled on top in bundles and added as the flames rise.

If you’re short on dry sticks, use your knife to cut away the damp exterior of any branches you find around your campsite. Larger materials like logs should only be used once the fire is robust enough to handle these bigger materials. You can stack them in a teepee-like structure to help the flames rise. But remember — your fuel source matters most. Without proper fuel sources, larger materials aren’t likely to ignite, especially in inclement weather.
Start the Fire
Now that you've created your fire pit, it's time to start the fire.
If you have a flint and steel starter kit, you can spark the fire in the middle of the pit. With a quality fire starter kit, you can create a flame quickly as long as you’re shielded from the wind. Your mini Inferno and Ferrocerium Rod is another great option. Once the tinder catches sparks, use cotton balls soaked in petroleum jelly as additional fuel — however, these implements will need a flame to ignite, and that’s why it’s so important to have a reliable fire-starter on hand first.
Once the fire is burning on its own, you can feed wood to the fire about every half an hour to stop it from dying out.
Use the fire to keep warm, cook food, and enjoy your time outdoors. You can also use outdoor blankets for sitting by the fire and staying warm. Or place them around you to shelter yourself from wind and snow.
Conclusion
Our survival instincts are strong — they are almost second nature to most of us. Still, if you are out in the cold, you’ll be in better shape if you know how to start a fire in the snow.
You might encounter problems with wet wood, frozen ground, and damp snow, but you can be completely self-reliant with the right tools and knowledge.
Pack your bag with fire-starting essentials, such as splinters, lint or cotton balls, waterproof matches, and more. For foolproof winter fires, get yourself a fire kit with an ignition source, such as flint and steel.
You’ll find high-quality wilderness survival items at Self Reliance Outfitters. Browse our selection of rescue blankets, fire kits, waterproof matches, and more so you have all the right gear for your outdoor adventures.